Skip to main content
Menu
Home
About Our Practice
About Our Practice
Meet Dr. Kurkjian
Online Reviews
Meet Our Staff
Traveling Patients
About Your Visit
Financing and Payment Plan Options
Kurkjian Aesthetic Membership
Tour Our Office
QUAD A Center
Surgical Procedures
Surgical Procedures Overview
Nose
Nose Overview
Rhinoplasty
Revision Rhinoplasty
Teenage Rhinoplasty
Liquid Rhinoplasty
Face
Facial Plastic Surgery
Facelift
Mini Facelift
Neck Lift
Blepharoplasty
Brow Lift
Chin Augmentation
Fat Transfer
KYBELLA
®
Buccal Fat Removal
Lip Lift
Facial Rejuvenation
Breast
Breast Surgery
Breast Augmentation
Breast Lift
Breast Lift with Implants
Breast Reduction
Body
Body Plastic Surgery
Tummy Tuck (Abdominoplasty)
Mini Abdominoplasty
Mommy Makeover
Liposuction
Arm Lift
3D Imaging System
Non-Surgical Procedures
Non-Surgical Aesthetic Treatments
Cosmetic Injectables
Cosmetic Injectables Overview
BOTOX
®
Cosmetic
Dysport
®
DAXXIFY
®
JUVÉDERM
®
RHA
®
Revanesse
®
Versa™+
RADIESSE
®
Sculptra
®
Liquid Rhinoplasty
Platelet-Rich Fibrin (PRF)
Skin Care Treatments
Skin Care Treatments
ZO
®
Skin Health
SkinPen
®
Microneedling
BroadBand Light (BBL) Skin Treatment
Dermaplaning
HALO
®
Laser Treatment
MOXI™ Laser Treatment
HydraFacial
®
Thread Lift
Chemical Peels
Shop Skin Care
ZO
®
Skin Health Online Store
Shop Aesthetic Treatments
Photo Gallery
Resources
Blog & Media
News Room
Patient Portal
TouchMD – MyTouchMD
Natrelle
®
Information Guide
Contact Us
Contact Us
Virtual Consultations
5801 Edwards Ranch Rd.,
Suite #200
Fort Worth, TX 76109
Call
817.870.5080
Text
817.442.3578
Please don't text for emergencies
Please do not text medical queries or emergencies
Kurkjian Plastic Surgery + Aesthetics
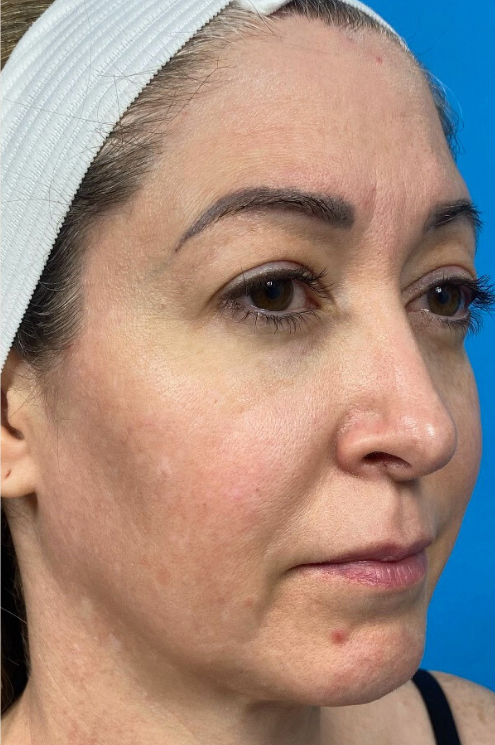
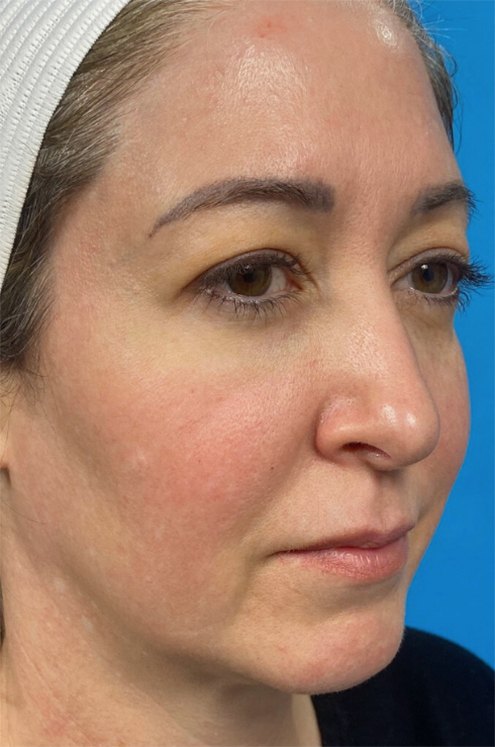
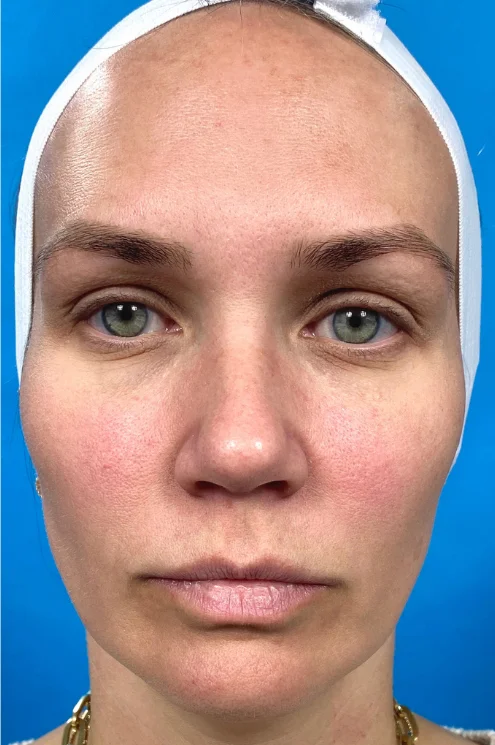
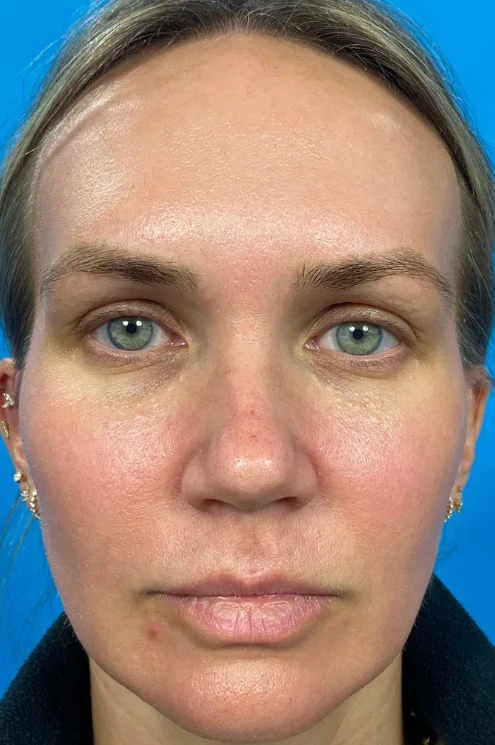
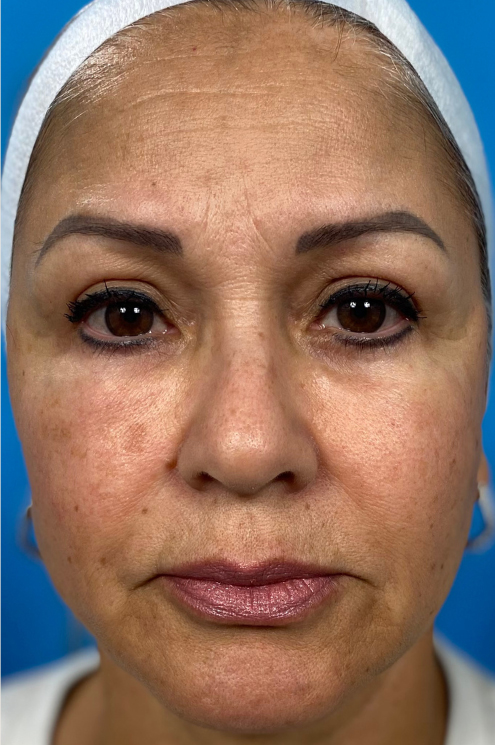
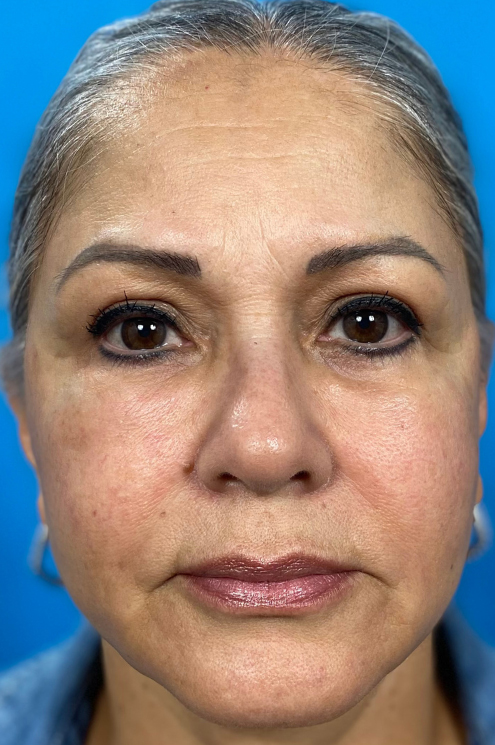
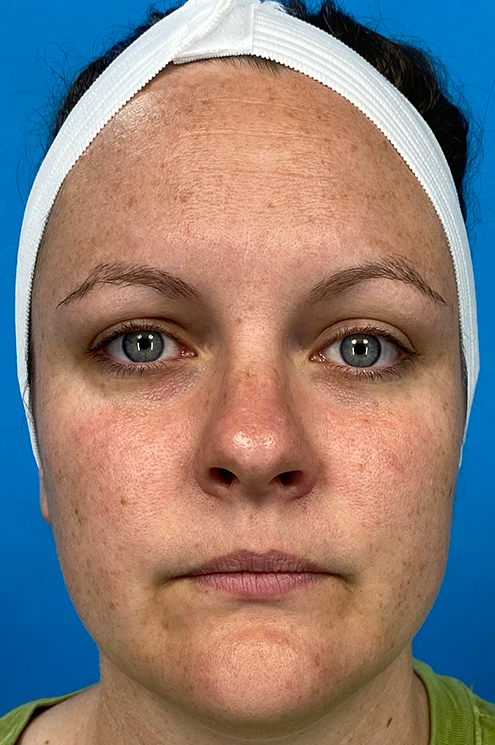
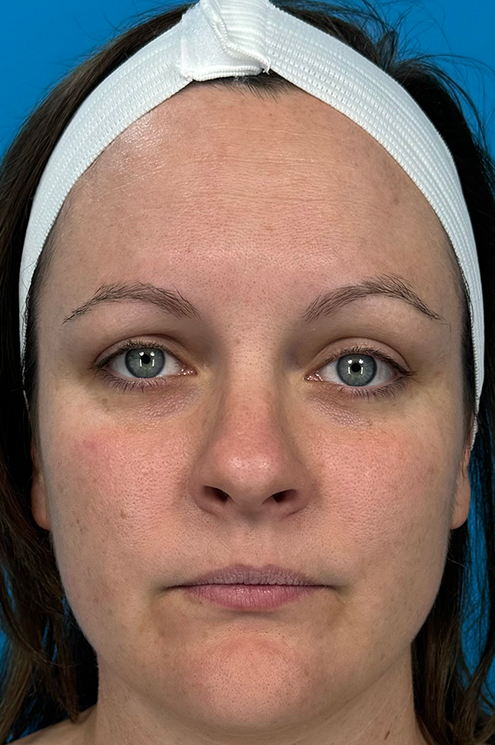
BroadBand Light (BBL)/HALO Laser Treatment Combo Gallery
Home
/
Photo Gallery
/
BroadBand Light (BBL)/HALO Laser Treatment Combo Gallery
Patient 1
View Details
Patient 2
View Details
Patient 3
View Details
Patient 4
View Details
Back to Main Gallery